Cover Girl

Olive Smokey FOTD featuring CoverGirl's TruNaked Pallet in Goldens

9:10 AM


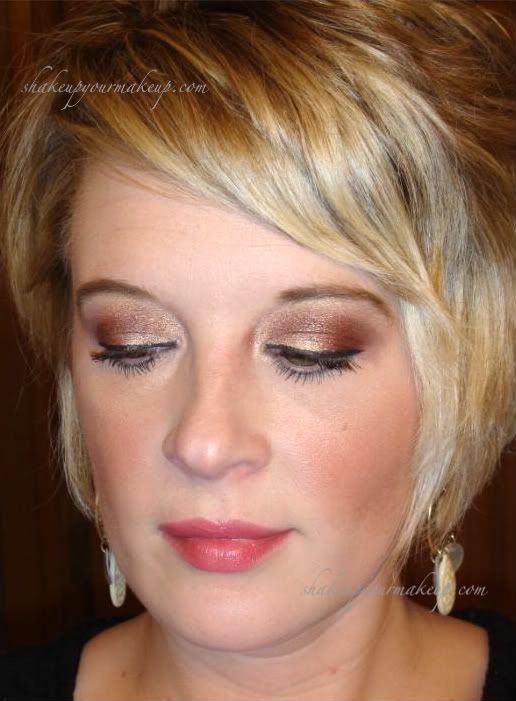
As I posted yesterday, I am really enjoying this new CoverGirl TruNaked pallet in Goldens.  The colors are just beautiful together, and you can create extremely neutral, to beautiful smokey eyes.  

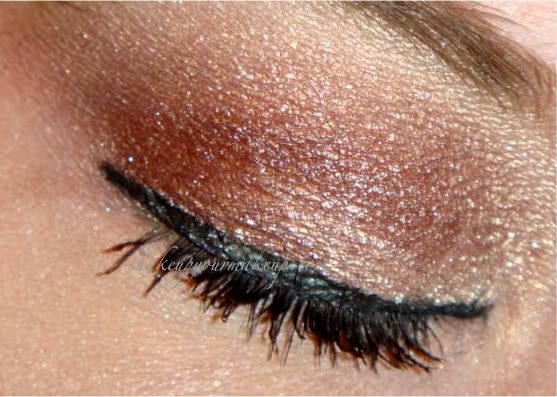
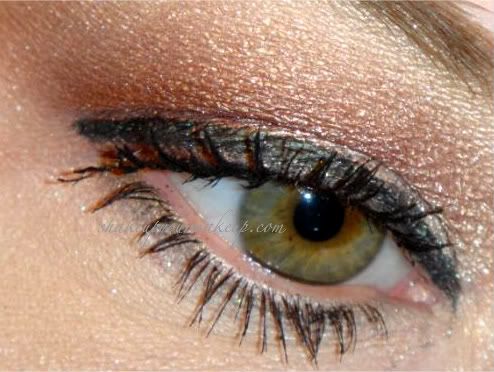
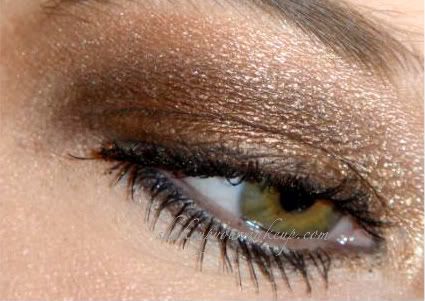
In this look I used the darker side of the pallet to create a smokey olive look.  In the crease I blended the dark brown (3rd from right) with the darkest shade (far-right).  On the lid I used the olive shimmer (4th from right) and also used this on my lower lashline.  To highlight I used the satin shade on the far left.  This color doesn't have much shimmer, but isn't a true matte.  This just brightened and lifted the eye.

Like I've said - a very versatile pallet at a great price!  I would love to hear what you think of these new colors from CoverGirl! 


Cover Girl

FOTD: Covergirl TruNaked Goldens Pallet

9:38 AM


I posted some swatches of the new Cover Girl TruNaked Goldens pallet, and today is a quick FOTD I did using them as well.  These are gorgeous, highly compatible and blendable shadows.  Like I mentioned in the earlier post, I am blown away by the quality of these, especially when used over a base.  CoverGirl was never my "go to" drug store brand for eyeshadows, but I am absolutely loving this pallet and will definitely take a look at the other two available.  I also will say, although they are attempting to be a dupe for the Urban Decay Naked pallets, these do have some different colors in the mix, making these a lot of fun to work with!

Below is my quick cut-crease with the pallet.  I used the darkest brown for the crease, blended it into the third-from-the-left and blended that into the third-from-the-right for my crease.  The lid is the second from the right, and my highlight is the farthest to the right.  Gorgeous - a simple and easy way to create a neutral cut crease, and at a drug-store cost!  

Lips are the Younique Opulence Lipstick in Stuck Up.  Cheeks is the Nars Orgasm blush.  


3d fiber lashes

FOTD: Wet 'n Wild Limited Edition 8-Pan Palette in "Walk the Red Carpet" & Younique Moodstruck 3D Fiber Lashes Mascara

9:00 AM


Today's look is using a Wet 'n Wild pallet that I forgot I had - untouched and sparkling up at me in my makeup drawer this morning....the Limited Edition 8-Pan in "Walk the Red Carpet".  This gorgeous pan is packed full of golden neutrals, some full of sparkle and some completely matte.  A beautiful set of colors, I can't believe I haven't opened it up until now!  Topped off the gold with my Younique Moodstruck 3D Fiber Lash Mascara and my Revlon Color Burst Matte Balm in Standout, and I was ready to go!  


Closeup of the eyes below - I just love the gold sparkle in the set!


FOTD Brown

FOTD: Urban Decay Naked2 Pallet

2:32 PM


After months...well make that years...of wishing I had the Urban Decay Naked pallets, I finally bit the bullet and purchased all three about a week ago.  Recently I have stepped away from neutrals and been using a lot more color with my eyeshadows, but there is something about bold looks using neutral shades that I love.  

To create the look here, I used the original UDPP all over my lid.  Above the crease, I gently applied Tease, which is a matte milk chocolate color.  I then took Snake Bite and applied that underneath, closer to the actual crease.  Black Out is applied right at the crease and outer "V", with YDK in the middle of the lid and Half Baked applied in the inner corner.  Finished the look off with a black eyeliner (NYX) and my Younique 3D Moodstruck lashes and I was set!  


Bare Escentuals

FOTD Using Bare Escentuals "The Star Treatment" Pallet

1:44 PM

 
My new favorite pallet - Bare Escentuals "The Star Treatment".  Not only are the colors mix and matchable, but they are gorgeous shades, extremely pigmented and creamy, and last all day without a single crease.
 

I used three of the four colors above.  The Black, gold and copper.  Actually, the copper looks rather muted in this picture, but as you can see below, it is quite vibrant on.

Face
Bare Escentuals Prime Time Neutralizing Primer
Bare Escentuals Original Foundation - Fair
Bare Escentuals Original Mineral Veil
Laura Geller Blush 'n Brighten Grapefruit - blush

Eyes
Bare Escentuals Prime Time primer - all over lid
Bare Escentauls The Star Treatment Pallet - Gold "Extravagance" - inner corner
Bare Escentuals The Star Treatment Pallet - copper "Bragging Rights" - inner lid
Bare Escentuals The Star Treatment Pallet - black "VIP" - outer corner/crease
Bare Escentuals The Star Treatment Pallet - ivory "Cart Blanche" - highlight
Physician's Formula Gel Eyeliner - Black
Mally Instant Impact mascara - Black

Lips:
Mally Liquid Lipstick "Punch"


FOTD Brown

FOTD w/ Maybelline Color Tattoo & Mally Liquid Lipstick

9:33 AM

 
I'm still feeling pretty crummy, but I did want to post a FOTD from last week using the Maybelline Color Tattoo in Bad to the Bronze and Mally's Liquid Lipstick in Mally's Look. 
 
Again, I am so impressed with these Color Tattoo's.  The colors are gorgeous and the lasting power is great.  I love them alone and as a base.  I am anxious to see these limited edition shades that are coming out for Fall. 
 
Like I mentioned in the post with swatches of the Mally Liquid Lipstick, this shade is such a universal and beautiful shade of pink, I leave this little beauty in my desk at work as my go to shade.  It is such a happy and pretty color. 
 
Hope you all are having a better week than me!  I can't wait for this cold to go away... 

FOTD Brown

FOTD w/ Maybelline Color Tattoo in Bad to the Bronze, Fyrinnae Newcastle and Milani Lilly White

11:48 AM


I wanted to post a very quick post with another FOTD using the Maybelline Color Tattoo in Bad to the Bronze.  This time I paired it with Fyrinnae's Newcastle and Milani's Lilly White Baked Eyeshadow.  These paired so well together, especially the Bad to the Bronze and Newcastle.  The Maybelline really wears like iron and is such a gorgeous shade.  I saw some pictures of some Limited Edition fall colors in the Color Tattoo's, so those are now on my list of things "I need"...

FOTD Brown

FOTD: Fyrinnae Polar Bear, Druid Werewolf, Avenging Salem, & Velvet Vampire

12:12 PM


Another FOTD, this time using some of my all-time favorite neutrals from Fyrinnae: Polar Bear, Druid Werewolf, Velvet Vampire & Avenging Salem.  All the sparkle and glitz in these neutrals really give them such complexity that is really difficult to capture in the photos, but I've attached several in hopes of trying. 


For the look, here is what I used:

Face:
Laura Geller Champagne Spackle
Laura Geller Balance 'n Brighten - Regular
Mally Bronzer
NARS Blush in Super Orgasm

Eyes:
Fyrinnae Pixie Epoxy - all over lid
Fyrinnae Polar Bear - inner corner of lid, inner portion of lower lashline
Fyrinnae Druid Werewolf - middle of lid next to Polar Bear and all along lower lashline
Fyrinnae Velvet Vampire - outer portion of middle of lid blended into Druid Werewolf and patted on top of Avenging Salem on the outer V
Fyrinnae Avenging Salem - outer corner blended into crease
Physician's Formula Gel Eyeliner - black
Loreal Voluminous Power Volume 24Hr Mascara - Black

Lips
Revlon Lip Butter in Candy Apple

Below are a few more pictures, plus a closeup of the eyes...


Hard to believe tomorrow is July 4th!  Anyone have any fun patriotic manicures or looks they plan on doing in celebration of the day?  I'll probably work on a manicure, but haven't quite figured out what I will do yet.


Bare Escentuals

FOTD: Bare Escentuals Celestine, Sassy Minerals Pandora's Box, Milani Lilly White and NYX Cream Pallet in Sweet Chocolate Brown

9:57 AM


I have been looking at my NYX Glitter Cream Pallet Sweet Chocolate Browns for a couple of days now trying to figure out something to do with them.  I've used them on top of eyeshadows, but one thing I've wanted to try is to apply the glitters on top of a black eyeliner to try and add some glitz.  I was drawn to the gold microglitter, so I built a look around it.  Unfortunately, I didn't have my "good" camera on hand, so the resolution isn't great below, but I think you can still see how it turned out.


For the look, I used the following:

Face
Laura Geller's Real Deal concealer in Light
Pur Minerals Foundation in Porcelain
Milani Baked Blush in Coralina

Eyes
Fyrinnae Pixie Epoxy
Bare Escentuals Eyeshadow in Celestine - inner corner
Sassy Minerals Eyeshadow in Pandoras Box - outer corner/crease
Milani Eyeshadow in Lily White - highlight
Milani Liqu'ify Eyeliner in Black
NYX Cream Pallet in Sweet Chocolate Brown - glitter gold on top of black eyeliner

Lips


These glitter pallets would be fun for New Year's Eve...just a thought!

Bare Escentuals

FOTD: Bare Escentuals Pussycat and Gold Leaf, Maybelline Pressworthy Pink, and Laura Geller Como

10:41 AM


 Years ago I was introduced to Bare Escentuals, and to this day I consider it one of my standard/go-to brands to use.  I was feeling inspired by all the beautiful golds and bronzes of fall, so I fell back to two of the prettiest shades I think BE has: Pussycat and Gold Leaf.  Below is how I put the look together.

Face:
Laura Geller Champagne Spackle
Laura Geller Real Deal Concealer "light"
Laura Geller Balance 'n Brighten Porcelain Foundation
Maybelline Blush "Pressworthy Pink"

Eyes:
Urban Decay Primer Potion "Greed"
Fyrinnae Pixie Epoxy
Bare Escentuals "Gold Leaf" - inner corner
Bare Escentuals "Pussycat" - outer corner, crease
MAC "Sugar Shot" - highlight
Tarte Emphaseyes Clay eyeliner - Black
L'oreal Voluminous False Fiber Mascara - Black

Lips
Laura Geller Dream Creams "Como"

A close up of the eyes below - Pussycat comes across as almost a dirty brown in the pot, but once applied is a beautiful deep bronze.  It's beautiful for fall.


Bare Escentuals

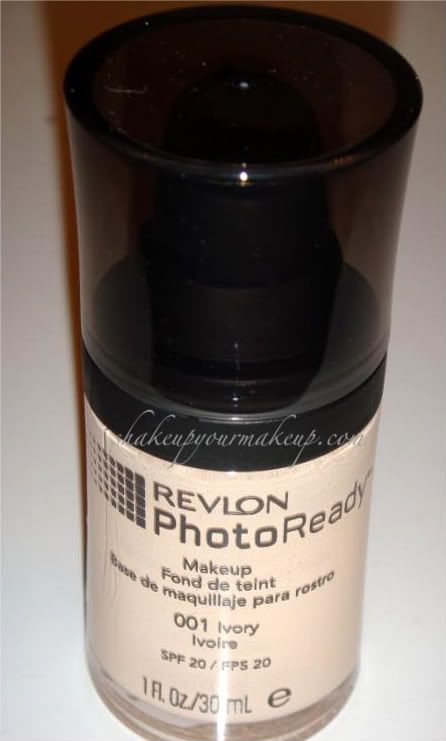
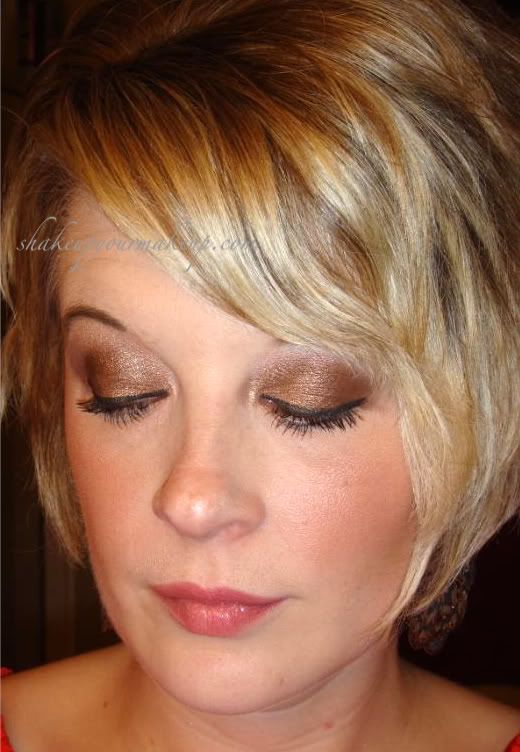
FOTD/Review Using Revlon PhotoReady Foundation "Ivory", Bare Escentuals Beautiful Autumn, and LA Splash "Regal"

1:02 PM


Whoops!  I meant to post this so much earlier!  I guess I forgot to set up the automatic posting! 

Anyways, here is quick look using the Revlon PhotoReady Foundation in Ivory.  As I mentioned in my previous post about this product, it does a great job of covering and creating a natural and smooth finish.  I really like the little bit of reflection or glow this creates.  It really makes the skin look healthy and smooth.  The foundation blended into my skin along the chin and hairline effortlessly, so I didn't have that "mask" that a lot of people complain about with liquid foundations.  My only complaint is a personal one, and that is that I'm not as quick and proficient with liquid foundation as I used to be, so this took a little getting used to! 

Face:
Revlon PhotoReady Foundation - Ivory
Bare Escentuals Mineral Veil - setting powder

Eyes:
Fyrinnae Pixie Epoxy
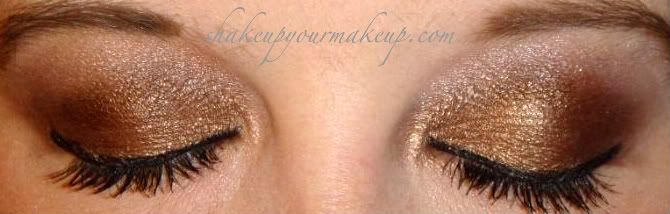
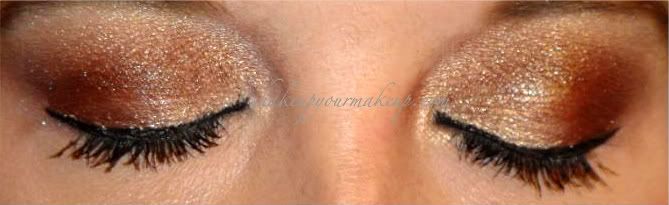
Bare Escentuals "Beautiful Autumn" - inner corner
LA Splash Cosmetics "Regal" - outer corner/crease
LA Splash Cosmetics "Nude Diamonds" - high light
Prestige My Blackest Lashes Mascara

Lips:
e.l.f. Luscious Liquid Lipstick "Raspberry"


Retail Price: $11.99 - $13.99

Where to purchase: CVS, Walgreens, Walmart...anywhere that carries Revlon
Product: 4 out of 5
Price: 4 out of 5
Packaging: 4 out of 5
Overall: 4 out of 5
Would I purchase again?  Although I am not a liquid foundation user, if I had to rely on one to get me through, I would choose this.  The product sets well, it doesn't oxidize once it is applied (no turning orange), and you can use any type of setting powder (I used Mineral Veil).  The coverage was medium, but definitely buildable, and again, I like the luminosity it gives the skin.  Most importantly, this is the first liquid foundation I've found at the drug store which matches my skin. 

Bare Escentuals

FOTD Using Physician's Formula Shimmer Strips Gel Eyeliner in black

8:00 AM

Since I posted about these fantastic Physician's Formula Shimmer Strip Gel Eyeliners yesterday, I wanted to post a FOTD using them as well.  Today I am posting a FOTD using the black pot of eye liner.  I also am using the new Wet 'n Wild Shimmering Berry blush and e.l.f. Lucious Liquid Lipstick in Raspberry.  


Like I mentioned yesterday, these eyeliners are so nice and smooth, it's hard to believe they are a gel liner.  The best part is...the looks below were only one swipe of the brush!  This means there isn't any cakey liner that flakes off into your eyes later in the day.  

Personally, I think using black eyeliner as "test" is great, because I can tell if a product is good by looking in the mirror at the end of the day.  In the case of eyeliners, I typically have what looks like black tears in the outer corners of my eyes due to oils smearing the liner.  If the liner gets an "A" in my book, the smearing is minimal by the end of the day.  In the case of these liners, I had absolutely NO smearing at the end of the day.  For once, a liner actually stays put!!


I also wanted to try out my new Wet 'n Wild blush in Berry Shimmer and one of my new e.l.f. Luscious Liquid Lipsticks in Raspberry.  I really am liking these Luscious Liquid Lipsticks - there is just enough color without being overbearing on the lips.

Face:
Bare Escentuals Foundation "Fair"
Bare Escentuals Mineral Veil
Wet 'n Wild Shimmering Berry Blush

Eyes:
Fyrinnae Pixie Epoxy
Fyrinnae Sticky Buns - inner corner
Fyrinnae Lousy Tip - outer corner and crease
MAC Pigment "Vanilla" - highlight
Physician's Formula Shimmer Strips Gel Eyeliner "black" - liner
Cover Girl LashBlast Fusion Mascara

Lips:
e.l.f. Luscious Liquid Lipstick "Raspberry"


FOTD Brown

Laura Geller FOTD Golden-Browns: Earthly Riches & Devil's Food

5:55 AM

I tend to "re-discover" eyeshadows every once in a while.  It may be because I get stuck on a particular brand or set of colors for a while, or it can be because I put the eyeshadow in the wrong drawer of my organization, but regardless, it is fun to find something that hasn't been worn in a while.  In this case, it was Laura Geller's "Earthly Riches" Baked Eyeshadow Duo and Devil's Food/Pink Icing  eyeshadow and eyeliner duo.  With the two, I decided to try out a golden/brown smokey eye.  This is really perfect timing, because I'm expecting my final installment of the "Eye Dream of Italy Collection" I ordered on auto-delivery!  Hopefully I'll get it soon so I can post pictures for you all soon.

Face:
Bare Escentuals Foundation "Fair"
Bare Escentuals Mineral Veil
Hard Candy Blush Crush Baked Blush "Honeymoon Peach"

Eyes:
Urban Decay Primer Potion
Fyrinnae Pixie Epoxy
Laura Geller's "Earthly Riches" - golden shade in corner of lid, and along lower lashline.
Laura Geller's "Devil's Food/Pink Icing" - brown shade in outer corner and crease
Laura Geller's "Milan/Rome" Duo - light ivory/copper shade along highlight.
Laura Geller's "Earthly Riches" - brown shade used wet as eyeliner
Rimmel Volume To The Max Mascara

Lips:
Mary Kay Lipstick "Downtown Brown"


Bare Escentuals

Rimmel Volume Flash The Max and Wet n Wild Mega Eyes Defining Marker

8:00 AM

I am always on the lookout for new mascaras, and Rimmel never seems to fail me with this respect. While wandering through the sale section of Halloween cosmetics (you can't beat 75% off false eyelashes!), I found that Rimmel has come out with another (and newer) version of their Volume Flash mascara - this one called Rimmel Volume Flash The Max. I also found Wet n Wild Mega Eyes Defining Marker eyeliner.

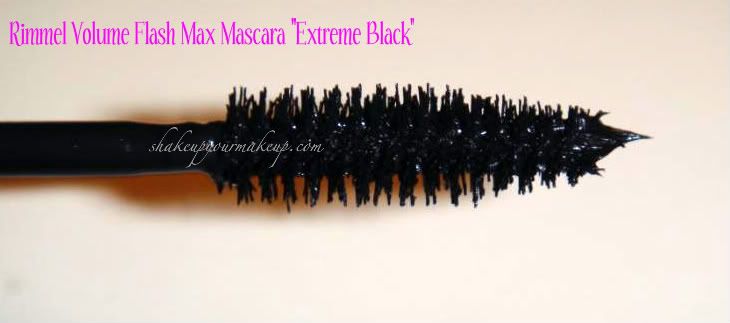
Rimmel Volume Flash The Max comes in the prettiest color package - I love bright pink, and it definitely stands out amongst the loads of mascaras I have in my drawer (especially those in black packages!). The tube is thick, so it's easy to hold onto and use. The brush is stiff, not flimsy, and reaches in between each lash (picture of the brush-head below).

Rimmel puts it best:

"Meet the latest addition to Rimmel’s successful Volume Flash range – The Max Volume Flash Mascara. It delivers up to fourteen times more volume for big, super-charged lashes. Take your eyes to the max with the supersized, perfect-fit brush that works in perfect synergy with the exclusive quick setting Lash Expand formula. The cushion-like collagen effectively binds to each individual lash, while the keratin works to smooth the surface of the lashes, leaving them stronger, sleeker and shinier.Capture that edgy London look than with big, bold attention-grabbing lashes."


The brush reminds me of the Maybelline Colossal Mascara brush, but not quite as clunky. The formula of this mascara is very smooth and isn't clumpy at all. Because of the viscosity of the mascara itself, you can layer and layer without looking like a spider when you're done - not to mention, you don't need more than two coats to achieve rich, thick and lush lashes.


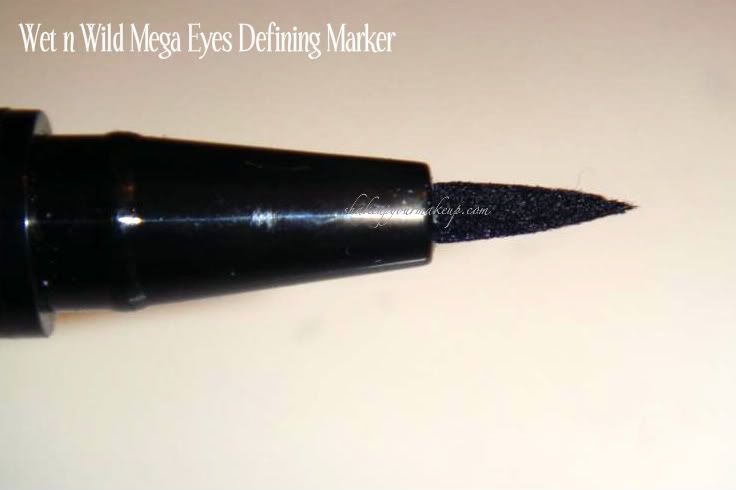
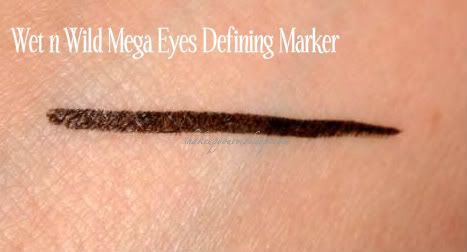
As I mentioned above, I also discovered the Wet n Wild Mega Eyes Defining Marker. I believe this only comes in black right now, which is fine by me! I love eyelining markers - mark. (Avon) had one a while back that I used so often it dried up and then they discontinued it, so I'm thrilled to have a replacement. I find that these are so much easier than pencils, your standard liquids, and even gel eyeliners because it is like you are drawing in your eyes, not using a brush or utensil to do the drawing for you.
"Don't be afraid to make your mark! This easy-to-handle liquid pen features a soft felt-tip edge for great definition and effortless application. The quick dry formula wears all day and is smudge-proof. Designed to help you create any look: draw a thin line for a subtle, yet well-defined eye or go dramatically bolder with a thicker line.

Features
Soft-felt tip edge for easy application
Long-lasting, quick-dry formula

Application Tips
Trace the natural lash line of your eyes starting at the inner corner of the top lid. Repeat on the lower lid. "

Below is an extreme closeup of the applicator - it looks like a calligraphy pen! It's flexible, and very forgiving when you apply. The line is very smooth and it's not so dark that it looks like you used a Sharpie on your eyes.


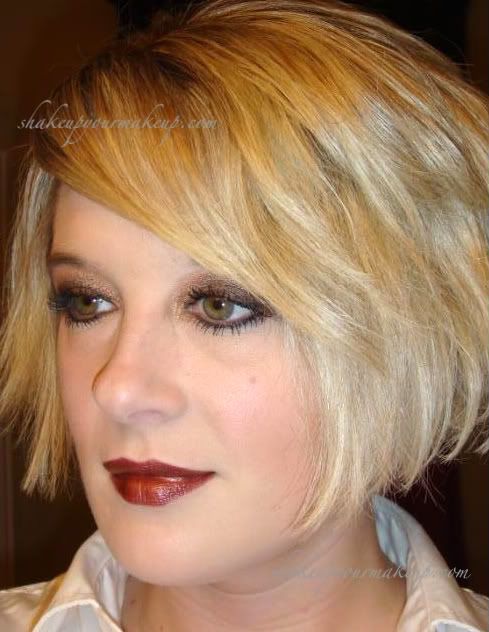
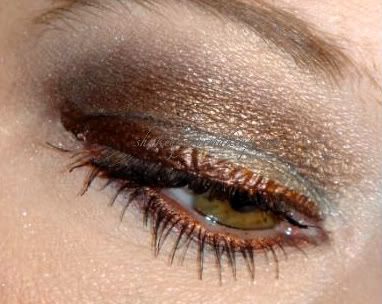
Although I didn't use the eyeliner in the look below, I did want to give you an opportunity to see the Rimmel Volume Flash The Max mascara at work. This is my very easy, go-to mascara, so I'm thrilled I found it (and only had to spend about $5 for it, too!). As I've said in the past, I think Rimmel makes some of the best mascaras out there.
Face:
Bare Escentuals Foundation "Light"
Bare Escentuals Hydrating Mineral Veil
Sassy Minerals "Plus One" Blush
Eyes:
MAC Paint Pot "Painterly"
Sassy Minerals "Dirty Martini" - inner corner
Sassy Minerals "Pandora's Box" - outer corner, crease, lower lashline, and wet as eyeliner
MAC Pigment "Vanilla" - highlight
Rimmel Volume Flash The Max mascara
Lips:
Revlon Color Stay Lipstick - Rich Raisin


Bare Escentuals

Sparkly FOTD - MAC Solarbits Sun Rays

9:04 AM

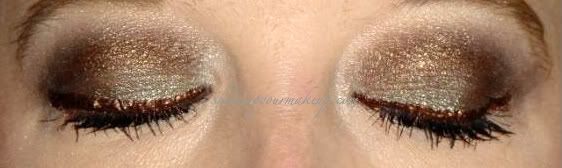
Spring keeps knocking on the door here in Indiana, and then will leave us for either colder weather or rain, so I've been getting a little frustrated with Ms. Mother Nature! This morning I needed something to brighten up the wardrobe from the blah blacks and creams I tend to lead towards when I'm in a "funk", so I decided to do a sparkly look, and what better than some MAC Solar Bits and pigments to help out!

Now, I know there are mixed reviews about the Solar Bits because of their very cumbersome consistency, but I find that using a fingertip and letting the pigments melt into the eyelid really can create a beautiful look. It does take some practice, but I find that you get very little fallout compared to using a brush.

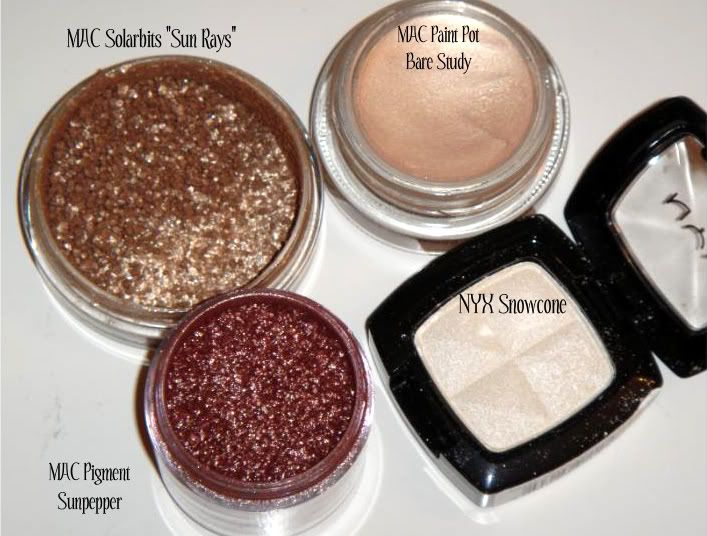
Below are the four eyeshadows I used - MAC Solar Bits "Sun Rays", MAC Paint Pot in "Bare Study", MAC Pigment in "Sunpepper", and NYX Eyeshadow in "Snow Cone".


Face:
Laura Geller's Balance and Brighten "Light"
Everyday Minerals Intense Multitasking Concealer
MAC Mineralize Blush "Merrily"
MAC Beauty Powder "Soft Focus"

Eyes:
Lumene Beauty Base Eye Base - all over eye/lid
MAC Paint Pot "Bare Study" - all over eye/lid
MAC Solar Bits "Sun Ray" - lid and lower lashline
MAC Pigment "Sun Pepper" - outer V and into crease
NYX Eyeshadow "Snow Cone" - brown bone
Black Eyeliner (unknown brand - it had rubbed off, but I think it is Revlon)
Max Factor 2000 Calorie Mascara "Black"

Lips:
Bare Escentuals Natural Lipgloss "Brilliance"


FOTD Brown

Review & FOTD: Sally Hansen Carmindy Foundation

9:53 AM

As I mentioned earlier this week, I ran into a CVS and found the Sally Hansen Natural Beauty by Carmindy line (finally!), and purchased the foundation and translucent powder below:


Now, I must preface this with I am a mineral makeup (mmu) lover through and through. I have not used liquid foundation in over 6-7 years because of my addiction to mineral foundations. I figured, being that the foundation was buy one get one 50% off, it was worth the try!

I was so pleasantly suprised when I used the foundation. It is extremely smooth and has great coverage. The color actually matched fairly well, especially considering the line has a minimal selection of colors to work with. The translucent powder sets the liquid foundation and gives a smooth and matte finish to the skin, which makes application of blush and eyeshadow so much simpler.

I used the following products, along with the Carmindy foundation, with this FOTD.


Retail Price: $12.00 USD

Where to purchase: Click here

Product: 5 out of 5
Price: 4.5 out of 5
Packaging: 5 out of 5
Overall: 4.5 out of 5

Would I purchase again? Overall, I would definitely buy this product again - it's great, especially being that it is a drug store brand!

Popular Posts

Like us on Facebook