FOTD Brown

FOTD: Urban Decay Naked2 Pallet

2:32 PM


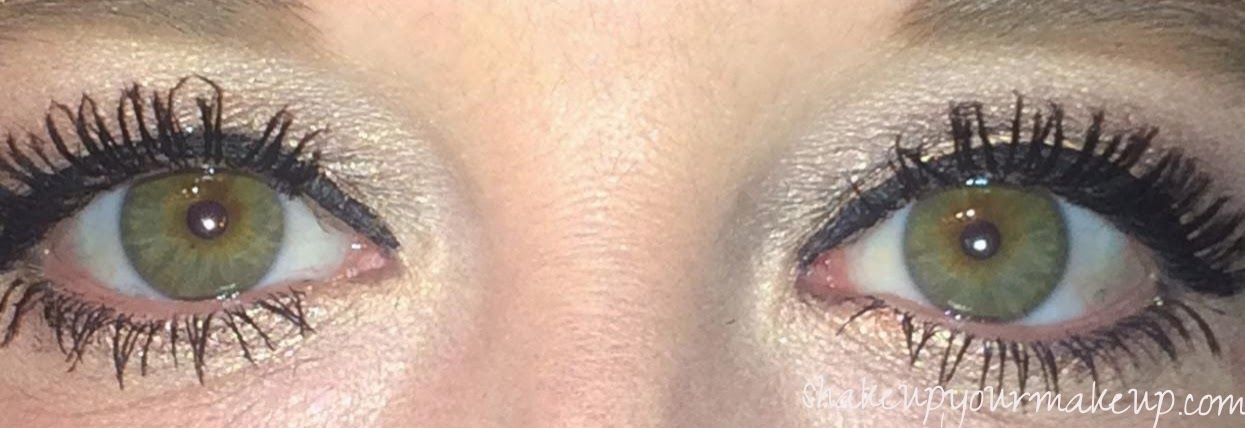
After months...well make that years...of wishing I had the Urban Decay Naked pallets, I finally bit the bullet and purchased all three about a week ago.  Recently I have stepped away from neutrals and been using a lot more color with my eyeshadows, but there is something about bold looks using neutral shades that I love.  

To create the look here, I used the original UDPP all over my lid.  Above the crease, I gently applied Tease, which is a matte milk chocolate color.  I then took Snake Bite and applied that underneath, closer to the actual crease.  Black Out is applied right at the crease and outer "V", with YDK in the middle of the lid and Half Baked applied in the inner corner.  Finished the look off with a black eyeliner (NYX) and my Younique 3D Moodstruck lashes and I was set!  


Mascara

Another look at Younqiue's Moodstruck 3D Fiber Lashes - Befores and Afters

2:17 PM


I have been using the Younique Moodstruck 3D lashes for several weeks now, and can't even explain how impressed I am with this product.  Not only does it give over-the-top length, but the dimension and thickness of the lashes are above and beyond as well.

I have tried several different ways of applying the product.  First, the way the directions describe (there's a thought!).  The product is designed to be applied as such:

1.  Apply a coat of your regular mascara and let dry.
2.  Apply a coat of the Younique Moodstruck Transplanting Gel.
3.  Immediately apply a coat of the Younique Moodstruck 3D Fibers 
4.  Repeat steps 2 and 3 as desired.

After several various methods of application, I have found out several things as far as my lashes and "everyday" mascara's are concerned.

1.  Use a light mascara.  By light I mean, don't use one of those mega-thickeners, as this can ultimately lead to spider lashes instead of a feathered lash effect.  Ultimately, I lean towards one coat of my standard: Mally Beauty mascara.  This coats my lashes with a rich black color, and helps them define.  

2.  Make sure to work quickly after you have applied the transplanting gel.  This makes sure the gel is still "wet" and can grab the fibers.  

3.  Work the fiber "mascara" wand back and forth in your lashes to create thickness.  If all you are looking for is length, brush from lashline to tip continual to straighten out the fibers, and ensure they are pulling your lashes up.

4.  Do not put the fibers all the way against your lashline - this prevents fall out into your lashes. 

5.  For added length, apply another coat of the gel at just the tips, and repeat with the fibers until desired length is achieved.

6.  Seal with Transplanting Gel when you have achieved the desired look.  This will prevent further fall out.  

Below is a before and after look.  The left eye has the Moodstruck 3D Fiber lashes (2 coats).  The right eye is has no mascara (1st picture), one coat of Mally (2nd picture) and 2 coats of Fiber Lash (3rd picture).  Amazing isn't it??


If you are interested in purchasing, I can certainly send you a link, or click here.  

EOTD Green

Bright Green FOTD Using L'Oreal Infallible in Golden Emerald

1:49 PM


Hands down one of the best drug store products I've come across in recent history are the new L'Oreal Infallible eyeshadows.  I have picked up several of them over the past year, and one of my favorite colors is Golden Emerald, which I am wearing in this FOTD.  I paired it with my Milani Infinite eyeliner in "Eternal" to really brighten the look.  Using Eternal actually made the L'Oreal appear more brown, so it obviously played the golden tones up more than it does standing alone or with black liner.  I really liked the combination.

Scroll down for more pictures.  Unfortunately, as I did this several weeks ago, I can't remember what else I used!


EOTD Silver

My First Review/Attempt at Younique Moodstruck 3D FIber Lashes - I Am Obsessed!

1:50 PM


For several months I have been reading about the Younique brand, in particular their Moodstruck 3D Fiber Lash mascara set.  I finally bit the bullet and signed up to be a presenter (a post about that to follow, including pictures of the kit you get).  Yesterday, when I got the presenter's kit, I immediately went to the Fiber Lashes and decided to play around with the set and see what the hype is about.  

Essentially, it's a three step process.  First, you apply a coat of your favorite mascara (I used Mally's Voluminous mascara, because I love how thick and black my lashes are, even with just one coat).  Second, once your mascara is dry, you apply a coat of the Moodstruck Transplanting Gel, which is essentially a black, sticky mascara that you apply prior to the fibers.  Third, while the Transplanting Gel is still wet, apply the black fibers.  Then, you're done!  If you want a more dramatic look, apply another round of gel and fibers!  I actually "sealed" my fibers with a light coat of the gel, just because I didn't know if they would fall out during the day.  They did not.  From the moment I put them on to the moment I washed my face last night, all of my lashes looked the same - rich, dark, thick, and amazingly long.  I am in love.  


Here is a snapshot of my full face, mascara and all.  Not only do my eyes look wide open (on about 4 hours of sleep), but they are a rich black, thick, and long.  I love this stuff.  Even if you wouldn't use it everyday (I will), using this for nights out or events, you won't be disappointed.  I can certainly see what all the hype is about!  One other bonus point - this is all natural and cruelty free.  Another MAJOR plus in my book!

If you are interested in purchasing, you can through me (link here).  

I am also wearing three of the pigments, which I will swatch and review later as well.  Beautiful colors and payoff - my Presenters set came with samples of both shimmer and matte, as well as concealers and blushes (which I am wearing).  So much to play with!


Popular Posts

Like us on Facebook